
Layout flow
Stack layers in a row or column that spaces and moves them for you, so longer copy pushes its neighbours along.
A layout flow makes a frame place its layers for you, one after another in a row or a column. Reach for it whenever copy changes length, so a price follows a title that wraps to a second line.
Add a layout flow
Select the layers
Select the layers that should sit together. Shift-click them in Layers, or drag a box around them on the canvas.
Add the flow
Press Shift+A, right-click and choose Add layout flow, or use Add layout flow under Arrange, Wrap in. The layers are wrapped in a frame. Kalpana picks a row or a column from how the layers are spread, keeps their average gap, orders them by position, and makes the frame hug them.
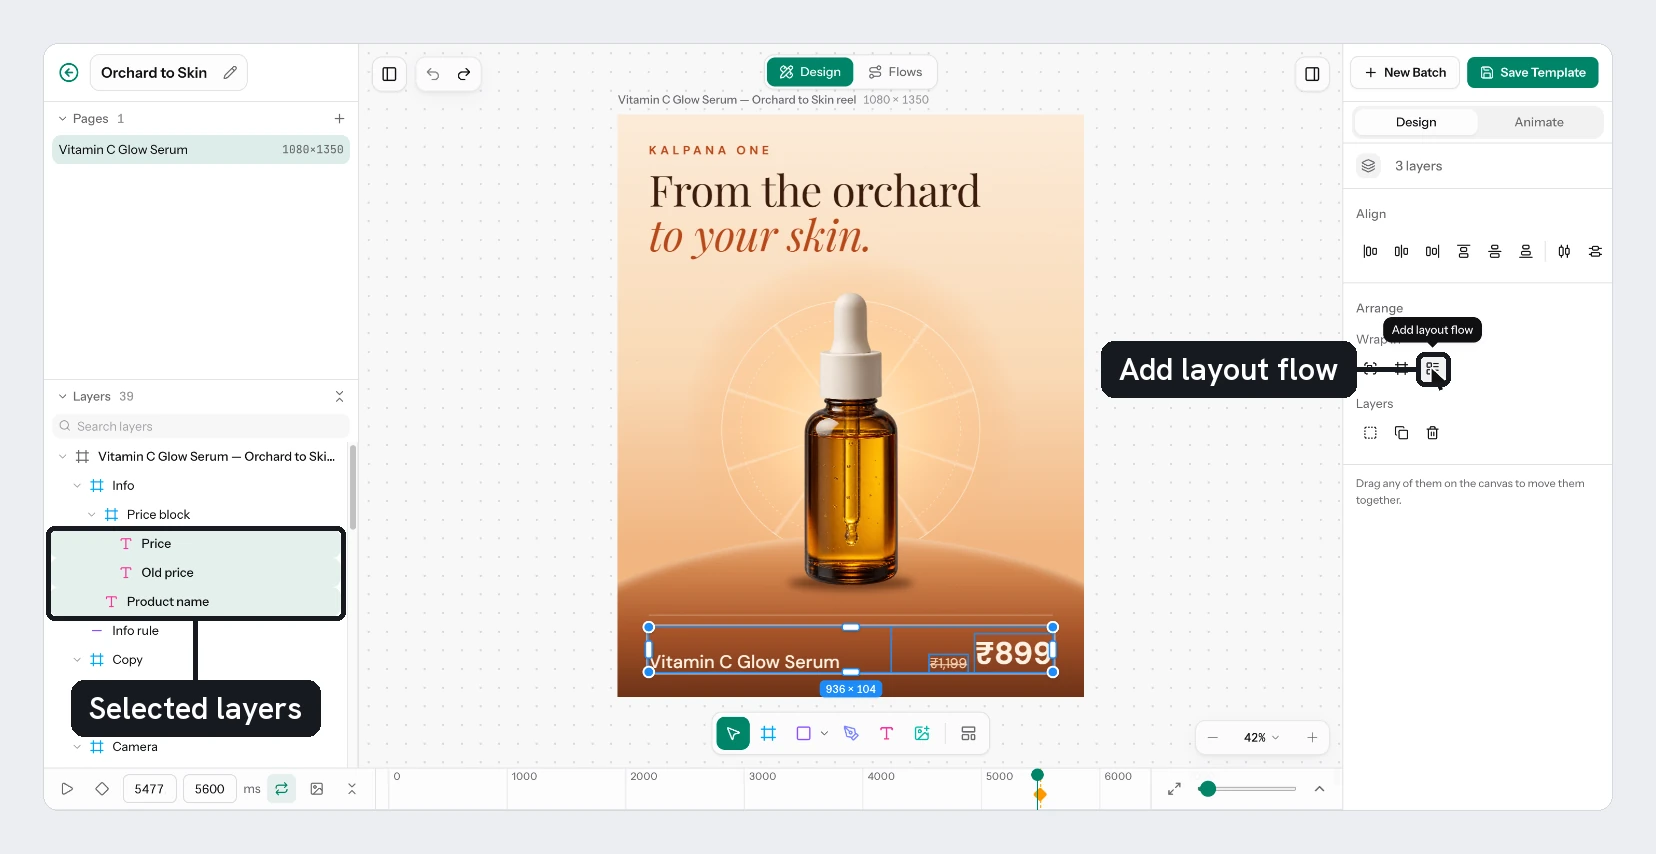
A group has its own button: Add layout flow, which turns the group into a frame. A frame that has no flow yet takes one from Direction.
Layout flow settings
The Layout flow section of a frame holds the settings.
| Setting | What it does |
|---|---|
| Direction | Freeform places nothing for you. Row lays layers left to right. Column lays them top to bottom. |
| Gap | The space between layers. With Wrap on, a second field sets the space between rows. |
| Wrap | Wrap onto more rows starts a new row when one is full. Rows only. |
| Align | Two lists. The first, Main axis, is along the flow: Start, Centre, End, Space between, Space around or Space evenly. The second, Cross axis, is across it: Start, Centre, End, Stretch or Baseline. |
| Padding | The space inside the frame's edge. One field is for left and right, the other for top and bottom. Padding per side shows T, R, B and L. |
| Clip | Clip content hides anything that overflows the frame. |
Choosing Freeform removes the flow, and the frame stops placing its layers.
Place one layer freely
Layers in a flow have X and Y greyed out. To pull one out, select it and switch on Ignore layout flow in Position. It then sits wherever you put it inside the frame, and the rest of the flow carries on without it.
Pair a layout flow with Fixed, Hug and Fill. The flow moves layers, and Hug and Fill let them change size.
Try it
On the sale card:
- Select Price and Was Price, then press
Shift+A. - Set Direction to Row, Gap to
16, and the cross-axis Align to Baseline. - Make sure Title has Box set to Wrap. Select the price frame and Title, then press
Shift+Aagain. Set Direction to Column and Gap to12. - Type a long name into Title, such as
Canvas Sneakers with a very long name. Put the original back afterwards.
You should see the prices move down when the title takes two lines.
Next
Updated 4 Nov 2026