Position, rotation and skew
Place a layer exactly, set its size, and turn, flip or slant it from the Design panel.
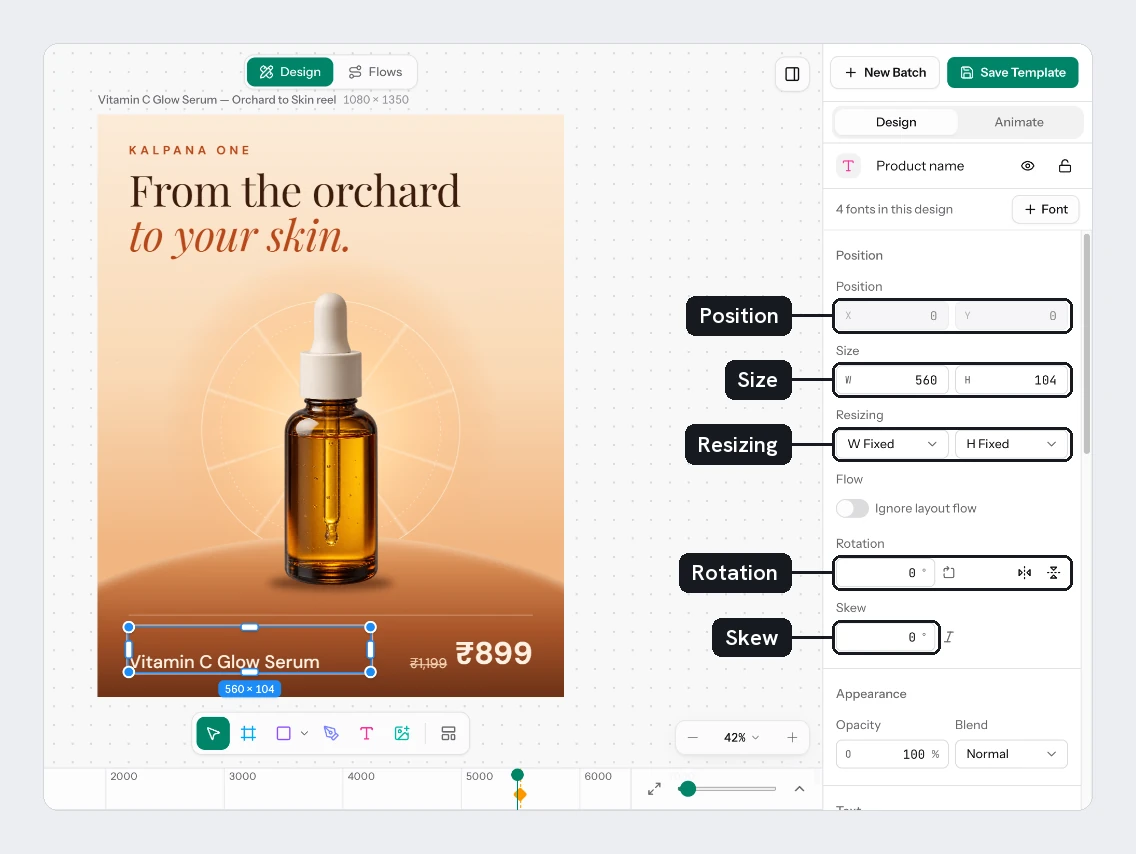
Dragging gets a layer close. The Position section of the Design panel makes it exact, which helps when you build each page size by hand.
Position and size
Set X and Y
Select a layer and type in X and Y under Position. They measure from the top-left corner of the layer's parent, which is the page or the frame it sits in. Arrow keys nudge by 1, and Shift with an arrow nudges by 10.
Set W and H
Type the width and height under Size. The padlock (Lock aspect ratio) keeps the shape while you type one of them. Text layers have no padlock. Their size follows the Box setting.
For a group, a combined shape, a polygon, a star or a path, the new size scales what is inside it. It applies when you press Enter or leave the field.
A layer inside a layout flow has X and Y greyed out, with the tooltip Placed by the parent's layout flow. The size fields are also greyed out when the layer is set to Hug or Fill. See Fixed, Hug and Fill.
Rotate, flip and skew
| Control | What it does |
|---|---|
| Rotation | Turns the layer, in degrees |
| Flip horizontal, Flip vertical | Mirror the layer |
| Skew | Slants the layer, in degrees. It stops at 80 either way. |
You can also rotate on the canvas. Drag a little outside a corner of the selected layer, and hold Shift to snap in steps of 15 degrees.
Try it
On the sale card:
- Select Badge. Set X to
40and Y to40. - Type
6in Rotation and see which way it turns. Use-6for the other way. - Select Product Image, switch on Lock aspect ratio, and type
640in W. The height follows.
You should see a tilted badge in the top-left corner and a smaller photo that keeps its shape.
Next
Updated 4 Nov 2026