
Text effect presets
Give a text layer a shadow, outline, glow or gradient in one click, and tune its colour and strength.
A preset adds a ready-made look to a text layer. The layer stays one text layer, so it is still one variable and each row can type its own words.
Apply a preset
Select a text layer
Open the Effects section of the Design panel. Text layers have a Text effect preset list at the top.
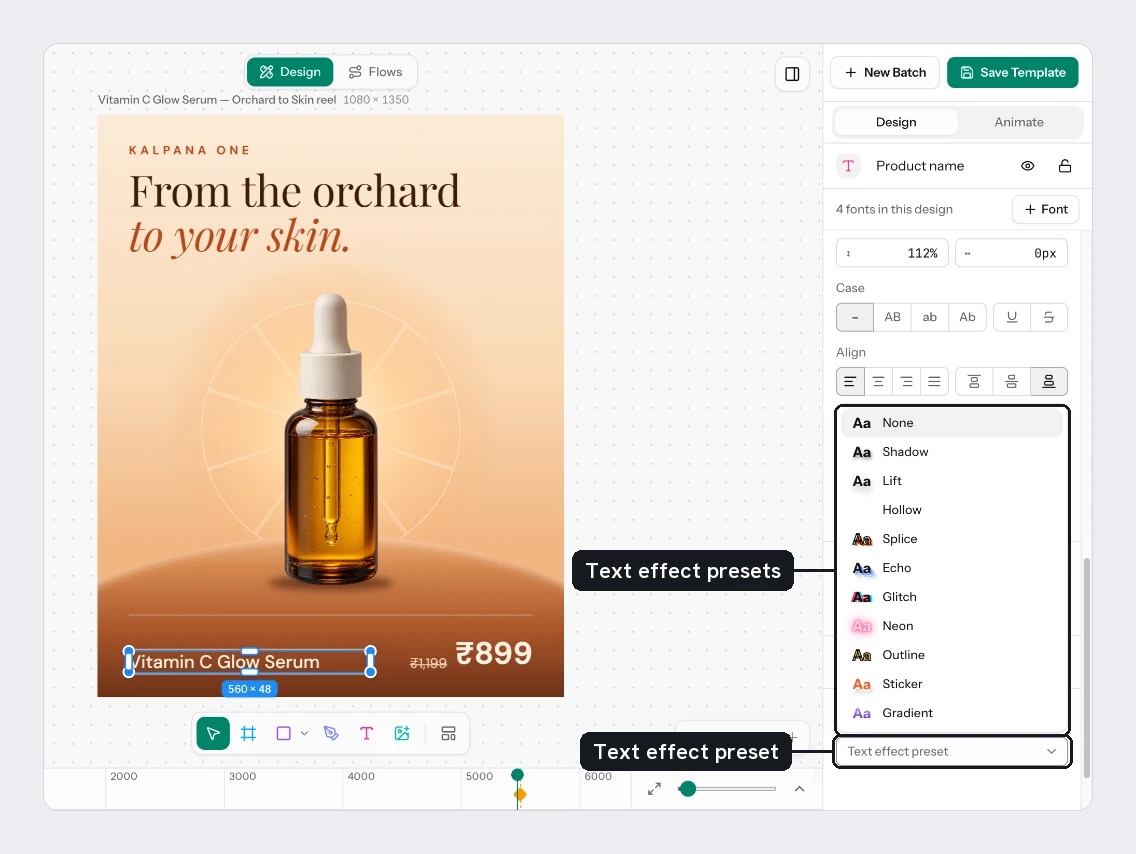
Set Colour and Intensity
After any preset except None, Colour and Intensity appear. Intensity runs from 0.1 to 4, and 1 is the starting point. A higher number makes offsets, blurs and line weights larger.
The presets
| Preset | Look |
|---|---|
| None | Clears the layer's drop shadows and outline |
| Shadow | A soft shadow, slightly down and right |
| Lift | A wide, soft shadow below the text |
| Hollow | An outline with no fill |
| Splice | An outline with a solid copy in a second colour offset behind it |
| Echo | Three fading copies stepping away from the text |
| Glitch | A colour split, red on one side and cyan on the other |
| Neon | A glow around pale text |
| Outline | Solid text with an outline |
| Sticker | A thick white edge with a light shadow |
| Gradient | A fill that runs from light to dark |
A preset replaces the layer's drop shadows and its outline, and Hollow, Splice, Neon and Gradient replace the text fill too. Blurs, noise and texture stay. The list does not show which preset a layer already has, so read the rows underneath it in Effects.
Try it
- Select Price and pick Lift. Leave Intensity at
1. - Select Badge and pick Sticker, with Colour set to white.
- Raise Intensity on Badge to
2and watch the edge thicken. Put it back to1.
You should see a soft shadow under the price and a white edge around the badge text.
Next
- Shadows, blurs, noise and texture, which also covers dots and lines along letters
- Strokes
- Fonts and styling
Updated 4 Nov 2026