
Gradients
Blend two or more colours across a layer, and fade a colour to see-through.
A gradient is a fill that changes colour across the layer. Reach for one to give a background depth, or to put a dark fade under text so it reads on any photo.
Make a gradient
Switch the fill to Gradient
Select a layer and click the swatch in Fill. At the top of the popover, switch the type from Solid to Gradient. The new gradient fades your current colour to see-through.
Choose the kind
The list at the top left sets the shape.
| Kind | Shape |
|---|---|
| Linear | Blends along a line. The Angle field turns it. |
| Radial | Blends outward from the centre in a circle |
| Angular | Blends round the centre like a colour wheel |
| Diamond | Blends outward from the centre in a diamond |
Angle only appears for Linear. Reverse stops swaps the two ends.
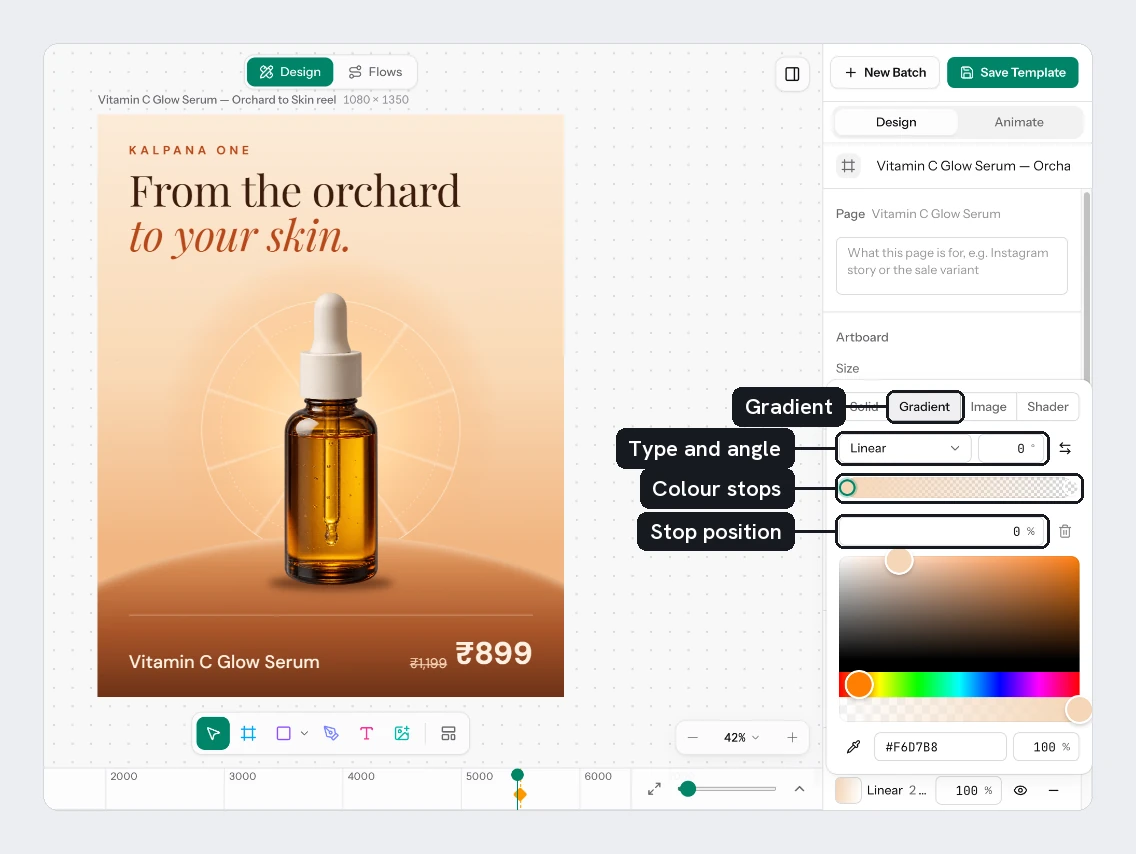
Edit the stops
The bar shows each colour as a circle, called a stop.
- Click the bar (Click to add a stop) to add one.
- Drag a stop to move it, or type its Stop position as a percentage.
- Click a stop to edit its colour below the bar. The colour has a hex field and an opacity percentage.
- Choose Remove stop to delete the selected stop. A gradient keeps at least two.
Keep the middle bright
Smooth colours blends the stops so the colours between them stay bright: blue to yellow passes through green rather than grey. It is on for gradients you make in Kalpana. Gradients that came in with an imported design keep their original blend, so they still match the source; turn Smooth colours on to change one.
Give a stop an opacity of 0% to fade to see-through. A black stop fading to a transparent black stop is the usual way to make text readable over a photo.
Try it
On the sale card, add a dark fade under the title:
- Draw a rectangle (
R) across the lower part of the card, above Product Image and below the text. Reorder it in Layers if needed. - In Fill, switch to Gradient.
- Set the first stop to black at
60%opacity, and the last stop to black at0%opacity. - Change Angle, or choose Reverse stops, until the dark end sits at the bottom.
You should see the title stay readable whatever photo a row brings.
Next
Updated 5 Nov 2026